
The folders you have to synchronize are called sources, and you have to
define at least two.
Each folder is located by its local full path name ('C:\blah\blahblah'), or its
full UNC path name ('\\MyPC\blahblahblah').
After you have defined them, you can start to analize them. The results' report is shown into the main window.
Then it's time to do the dirty work and the program will do it for you.
In this way you can synchronize several folders just by a couple of clicks.
Remember that whereever you are, you can press F1 to get the help.
Select the proper toolbar button, the menu .
You can simply add it from the right-click menu or by clicking on the toolbar (or you may drop a folder from the Explorer).
A dialog containing all available source's options
will appear.
Here input the path field. Leave the other params to
the defaults, and then click OK.
Repeat the operation for each folder you have to handle.
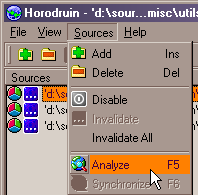
After having set up all needed sources, you have to analyze their contents to
fill them with files stats data.
So click on , or press F5.
Note that each source has its own access rights that can be edited, and its current status.
The program will start to collect data about sources' contents. A small window will show you the operation progress.
When the task is completed, a brief report is displayed for each filled
source.
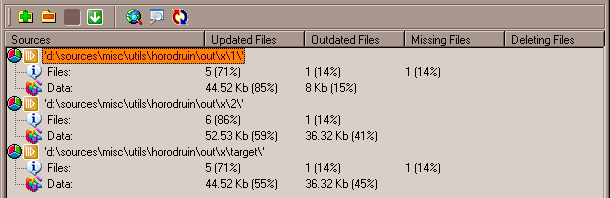
From here you can have an idea of what is going on. For example, into the above report, no source is updated.
If you see an unknown icon, you can press F1 to see the description.
Now click on , or press F6 and the program will do the dirty work.

Finally a dialog appears with the report of occurred errors (if any).
Congratulations. You have completed the task.